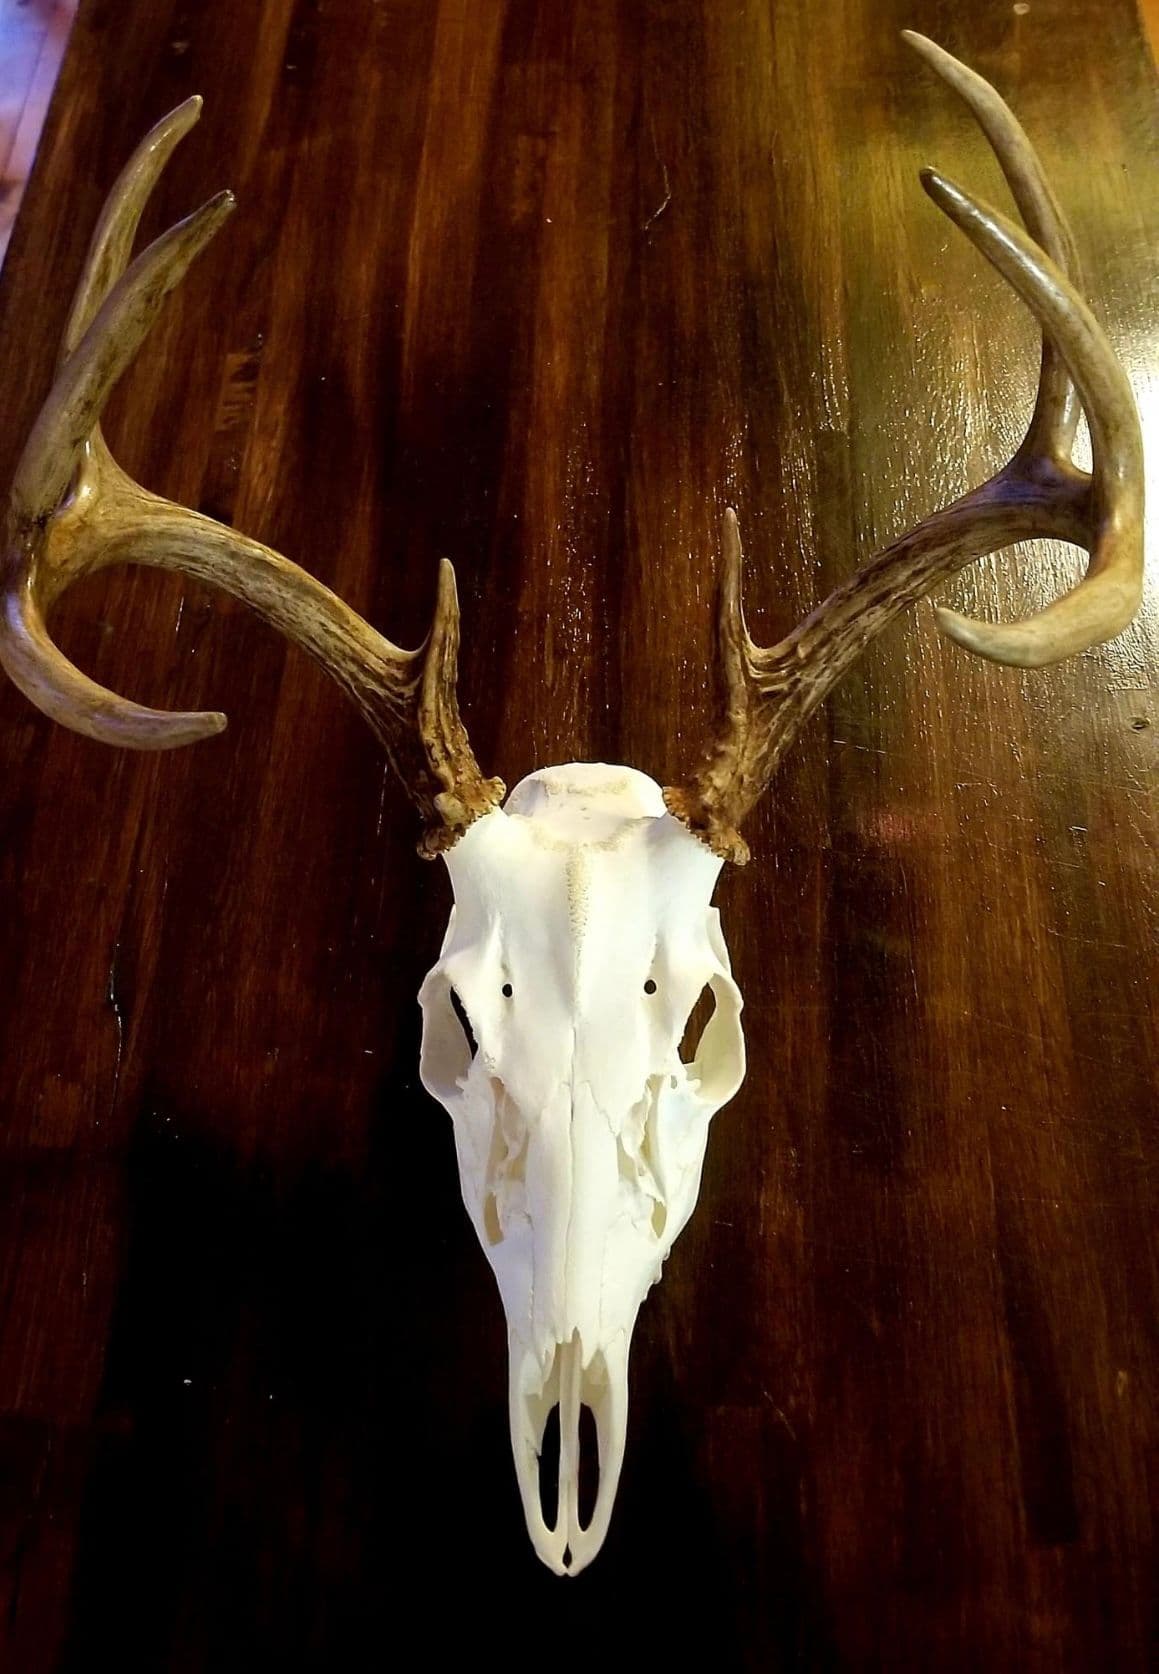
Remembering the Hunt: The DIY European Mount


Justin Hunold
11/15/2024
When we talk about the lasting memories of the hunt, it's more than just the story; it's the physical reminders we bring back. With its raw simplicity and natural beauty, the European mount has become a prized way for hunters to honor their adventures. It makes for an eye-catching display, and a DIY European mount brings another level of satisfaction, connecting you to the hunt from start to finish. Let’s dive into the history of the European mount, why it’s a great way to preserve memories, and the steps to creating one yourself.

The History of the European Mount
The European mount, or "Euro mount," originated centuries ago. European aristocrats, travelers, and hunters would display skulls as symbols of their hunts, showcasing both the animal and the hunter’s skills. There’s something timeless about the skeletal structure that captures an animal’s essence in a raw, natural form. This primal simplicity has helped the Euro mount become a popular choice, especially for hunters who value authenticity over flashiness.
Why Choose a European Mount?
The European mount isn’t just about hanging a trophy. It’s about respect, memory, and a connection to the hunt. You’ve trekked the land, endured the elements, and earned that experience. A Euro mount captures that journey tangibly. It preserves the animal's memory, and the process can be as rewarding as the hunt.
With a European mount, the skull tells a story all on its own. The skull structure and antlers or horns reveal details about the animal’s age, battle scars, and sometimes, even its habitat and lifestyle. You’ll be taken back to that time in the field every time you look at it.
Preparing Your Game for a European Mount
If you plan on doing a European mount, it starts in the field. After you’ve harvested your animal, you must prepare it for the process. Start by skinning the skull removing as much flesh and tissue as possible. A sharp knife will help with this, and gloves are recommended to keep things clean.
Be thorough, but don’t worry about perfection here. You’re just setting the stage for the cleaning and whitening process that comes next.

The DIY European Mount Process
- Boiling the Skull: Boiling is the classic method for DIY European mounts. Place the skull (not the antlers) in a pot of simmering water and add a small amount of dish soap or soda ash to help break down tissue. Boil for several hours, then remove and begin the tedious but rewarding process of removing any remaining flesh with a small brush or pick.
- Degreasing: After the skull is cleaned, it’s time to degrease. Soak it in a mixture of warm water and a little bit of dish soap for 24-48 hours, changing the water frequently. This process ensures the skull doesn’t turn yellow over time.
- Whitening: Using hydrogen peroxide to give your skull that signature bone-white look. Soak the skull in 3% hydrogen peroxide (the kind from a pharmacy) for about 24 hours. Avoid bleach—it will weaken the bone structure. After whitening, let the skull dry completely.
- Sealing (Optional): Some hunters prefer to seal their skulls with a matte finish or clear coat for a polished finish. This step isn’t essential, but it can enhance the mount’s appearance and make it easier to clean.
Options for Customizing Your Mount: Replica Skulls and Hydro Dipping
For hunters who prefer to avoid processing their game skulls or want a more custom display, replica skulls are a great option. These realistic replicas mimic the look and feel of a real skull but are easier to handle and maintain.
And if you’re looking for a little extra flair, hydro dipping is an option that is gaining popularity. This process allows intricate graphics and patterns to be applied directly to the skull. Imagine your mount with a camouflage pattern, American flag, or custom design. Hydro dipping gives your mount a unique look that speaks to your personality and hunting style.
Displaying Your European Mount: Skull Hooker and Other Products
Once your mount is ready, it’s time to consider the display. The Skull Hooker is a popular choice among DIY hunters. This metal hook system allows you to mount the skull on the wall easily and at an angle that perfectly shows off the antlers. Its minimalist look complements the Euro mount without detracting from it.
Other display options include wood plaques, pedestal mounts, and even custom backdrops that tell the story of where you harvested the animal. A pedestal mount can add a sense of grandeur to a mount, perfect for larger trophies. Meanwhile, for those with multiple mounts, consider a tiered display system to showcase different species or hunts in one setting.
A Final Thought
A European mount is more than just a trophy. It’s a memory, a tradition, and a reflection of the hunt. When you hang that skull on the wall, you’re not just displaying an animal—you’re showcasing the journey, preparation, patience, and respect for the land and its creatures. So, whether you’re boiling your own or customizing a replica, the process is as rewarding as the hunt. Let your mount be a piece that keeps the spirit of the hunt alive year after year.